The babywearing world is a big one. There are dozens of carriers, wraps, and slings out there to overwhelm a new parent. And babywearing wraps make up an entire planet all on their own – with so many styles, brands, patterns, and fabrics to choose from, you’ll be sure to find the perfect one for you and your baby. The great thing is that all wraps allow you to wear your baby in the most universal position – the front inward facing position. You know, chest-to-chest, frog legs, and the best snuggles imaginable. Yup, that’s the one. It also happens to be the position we focus on and outline here.
A little heads-up though: tying these wraps do come with a bit of a learning curve. Thankfully, it’s not an impossible feat and most wraps have the same general method of tying them. Which means, once you’ve got it down, you’ve got it down.
So get ready, set, wear!
Wrap carry positions
Let’s familiarize ourselves with the most common positions first. There are typically four different carry positions which can be utilized by baby wraps. These positions are front carry facing in, front carry facing out, hip (side) carry, and back carry. But keep in mind, not all wraps are made the same, and not all will allow you to wear your baby in all four positions.
Now let’s take a closer look at each one:
The front inward facing position is probably what comes to mind when most people think of baby carrying. And rightfully so, because it is the most common carrying position and the one that can be used with any wrap. And most other carriers, in general too. You can use this position from the newborn stage with most wraps and can continue it through the toddler years. And hey, you nursing mamas reading this – most wraps support discreet breastfeeding in this position! Cue the happy dance.
A few wraps will allow you to wear your baby in the front while facing outwards. Or forward. Whichever way you’d like to term it. But it’s where your baby’s back is to your stomach/chest. The general consensus in the babywearing world is this – facing out in most wraps is not ideal. It does not fully support baby’s bottom and legs like the facing in position would. Some wraps, like the Moby wrap, come with a separate piece of fabric that works as a seat belt around your baby and you, to allow for this position.
The hip carry position, also known as the side carry, is when baby is worn on your side, or just above your hip. This is a good position for babies who are slightly older and have begun to sit. Ideally, three months or older. It’s also a great position for the curious minds that have started to emerge. You get to wear your baby in a safe and supported position, while she gets to look around at the world. If you center your baby high enough on your chest, it can make for an ideal position for your newborn, too.
Finally, there’s the back carry. Here, baby is worn like a backpack, high on your back. Some wraps do not support back carrying. Stretchy wraps, for example, do not allow for babies to be worn on your back because the amount of give in the fabric can prove to be unsafe if baby jerks her body or head. For the wraps that do allow this position, it can be used from six months on, when baby can sit unassisted and has perfected her neck and head control.
Babies can be worn on the front or on the hip using essentially the same tie – a front wrap cross. This includes wrapping the fabric across the torso and then passing both ends from one shoulder to the opposite side hip in order to make an ‘X’ on the back. The only difference is that babies are scooted over to the side for the hip carrying position.
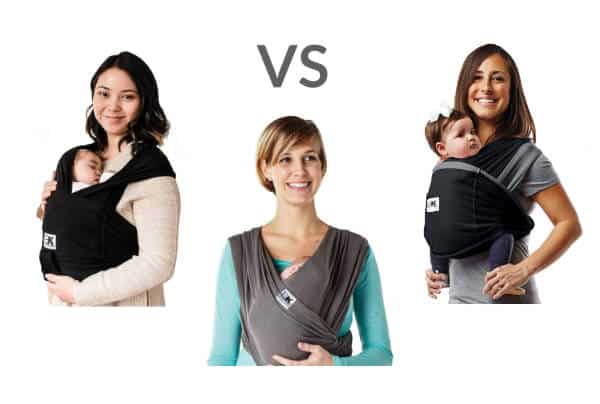
Tying stretchy vs woven wraps
So, what’s the difference between stretchy and woven wraps? Well, let’s knock out the similarity first: both are long pieces of fabric that you wrap around your body and baby for multiple carrying positions.
Stretchy wraps are, well, stretchy. They must be made with a certain percentage of spandex to offer a lot of give. The strand of fiber here is knit into the fabric which can stretch in any direction. Woven wraps on the other hand are made from fibers which are woven into the fabric. This results in a minimal amount of stretch. Now what’s the difference when it comes to tying them?
Stretch wraps need to be tugged and pulled in order to create a secure, snug position. They often have to be readjusted frequently to avoid slack. Woven wraps do not need to be pulled as much or stretched while wrapping around baby. The ties for both are the same for the front facing in position. Woven wraps are more versatile in this category and offer dozens of different ways to tie your child for multiple positions.
How to tie a baby wrap
Here are the step-by-step instructions on how to tie a baby wrap using a woven wrap. We cover the “how-to” on stretch wraps later under the Boba wrap category.
1. Find the middle marker and place it at the center of your chest while bringing both ends of the wrap to your back.
2. Bring both ends up to your shoulders making an ‘X’ across your back.
3. Slide your baby into the “pocket” that runs across your torso while guiding her legs.
4. Pull up the panel and cover your baby’s back entirely with it. Leave out arms so your baby doesn’t feel constrained.
5. Pull the bottom panel up between you and your baby to fully support her bottom
6. Gather both ends under your baby’s bottom. Tighten by pulling each strand individually to bunch them underneath to ensure a secure fit.
7. After tightening, cross both ends underneath baby’s bottom and across the opposite leg towards your back.
8. Tie a double knot with both strands on your lower back
9. Spread the fabric coming from your shoulders across baby’s back for full support.
How to tie a newborn wrap
Wearing a newborn requires the same tie and the same steps as wearing an older baby in the front facing in position – as outlined above. There is a slight modification you could make in order to keep baby more comfortable.
This adjustment comes just after tightening the ends from the shoulder and before tying your double knot in the back. Instead of crossing the tails underneath baby’s legs, twist both ends and wrap across to your back to finish tying it into a double knot.
How to tie a Boba wrap
Boba wraps are made from a stretchy material. Even then, tying it for a forward front carry position is quite similar to the method mentioned above. The key difference here is that it is entirely wrapped and tied before you carry your baby.
1. Find the Boba logo and place it facing outwards on your chest.
2. Bring the two pieces to your back and cross over your shoulders making an ‘X’
3. With the pieces now in the front, tuck both ends into the front panel with the logo. Pull and tug in order to keep the tension.
4. Cross these pieces and bring them across your waist and to the back. The cross should be towards your chest instead of lower towards your navel.
5. Tie the strands with a double knot on your back. If the pieces are still long, you can wrap around your back and tie the knots in the front or on the side.
6. Slide your baby into one shoulder piece at a time.
7. Pull up the front panel to cover baby’s bottom, back and neck.
How to tie a Moby wrap
Tying a Moby wrap entails almost the same exact steps as tying a Boba wrap. The one tiny difference is in the very beginning: when you find the center panel, you fold it in half and wrap around your navel to create a pocket. The video below does a great job in illustrating this!
How to tie a K’tan wrap
K’tan wraps are slightly different than Boba or Moby wraps. K’tan wraps involve no wrapping whatsoever. It comes as a double-looped wrap (resembling the number ‘8’) which goes over your head and slips through each arm. You add baby in and can also cover baby’s back with the included sash which offers more support and protection for both you and baby.