Before there were baby carriers with all the bells and whistles that you could pick up from Target or order from Amazon, women used linen or cotton. Sometimes these pieces of fabric were specially made to be used as baby wraps. Other times, they were made from sheets or whatever scraps they could find.
Baby wearing is truly a timeless practice. And it gives us a window into other cultures and times, letting us see their innovative practices and parenting styles. For more information, instructions, and demos of how anyone can use a sheet as a baby carrier, keep reading below!
Can you use any type of sheet?
As long as the length is about 80 inches, you should be able to use any piece of fabric as a baby carrier. Just be sure there isn’t too much “give” or stretch to the fabric, as you’ll want a sturdy wrap that won’t let your baby wiggle or slide down your body. Standard sheets and blankets are 90 inches long, so you should be all set if you use something similar.
Other things you’ll need
Ring
This is entirely optional. But if you are decent at sewing, you can also purchase metal rings to make your own ring sling. Many prefer slings because the hip position is a natural hold for moms and is perfect for older babies as well.
Other Fabric
If you don’t have a bed sheet handy, you can also consider using a heavy scarf or tablecloth. Just make sure the length is there.
What carry positions are possible with a sheet carrier?
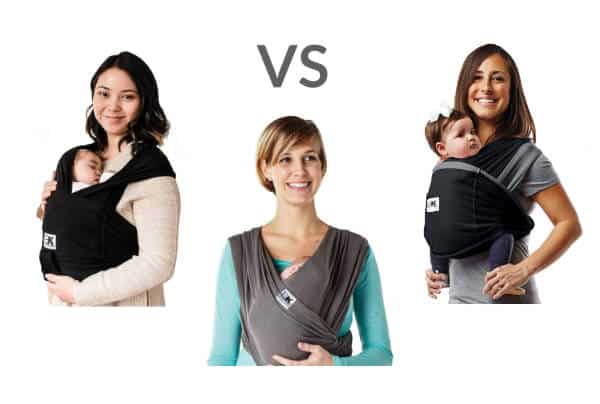
Like a woven wrap you might purchase from the store, you can wear your baby front facing in, front facing out, hip carry, and back carry. You may also wear them front facing out, but it’s important to make sure they have a supportive seat so they’re legs are in the “M” position.
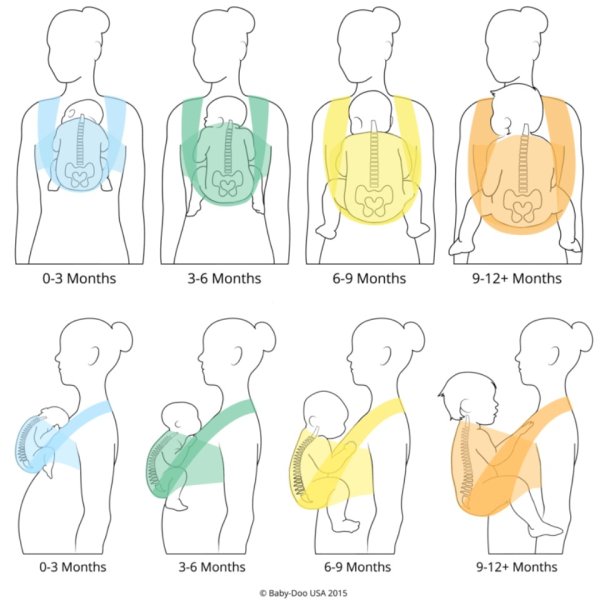
What age is a sheet carrier suitable for?
This depends on the carry position. You can use a sheet carrier from newborn to toddler. However, newborns should only be worn front facing in, and in the kangaroo carry (legs pulled into the chest). For older babies and toddlers, a back carry is probably most comfortable for the parent.
Step by Step Instructions
Cover your back
Take both ends of the fabric in your hands and drape it diagonally across your back. Keep the material as flat as you can. Wrinkles can be uncomfortable for you and the baby. Pick your dominant shoulder or whichever one feels most natural for carrying your baby.
Pinch
Gather the material resting on your shoulder, making it as skinny as possible. Later on, you can spread the fabric over your baby to ensure a snug, comfortable fit.
Double that
Repeat that pinch, but on the fabric still hanging on the other side. Do your best to keep the material on your back flat as you do so.
Knot
Next is the slip knot. For a detailed explanation of how to tie a slip knot with both ends of your wrap, follow this detailed explanation from New Folks.
“Take the bottom end (by your hip) of the fabric across your chest. This is now your horizontal end.
Place the horizontal end across the vertical end of the fabric (make a + shape).
Cross the horizontal piece behind and up through the top.
Drop the horizontal end of the fabric down, taking it underneath and over the vertical end.
Pull the fabric through the loop to complete the knot.”
Size it up
This next part is really about customizing the fit of your carrier to you and your baby. Slide the knot up and down to adjust the height. Then, make sure you spread the fabric to make a comfy seat for your baby’s bottom. Place them inside and start adjusting the fabric by pulling it up and over their back. Double check their legs for proper hip placement. Remember, dangling legs are not good and puts strain on their joints.
Practice
This is the single most important step. Baby wearing (especially wrapping) takes practice. Over time, the motions become second natural and easy to do, even with screaming infants and a house full of chaos. Try wearing your baby for a little bit every day and you’ll be a pro in no time.
For more carrying positions and tips, take a look at this channel, WrappingRachel, on Youtube: