There’s conflicting advice out there on whether sterilizing baby bottles is necessary or not. Do you want our opinion?
Yes, you do, that’s why you’re reading this right?
Why wouldn’t you sterilize?
Some (but not all) major health organizations recommend sterilizing before feeding (but more on that later).
Sterilizing baby bottles in a basic microwave steamer takes very little of your time. If that little bit of time reduces the risk of your little one sucking down a nasty virus, why not do it? You do everything else you can to protect them, don’t you….
The Best Baby Bottle Sterilizers – Our Picks
- Philips Avent – Simple, easy to use, 4 x 9oz bottle compatible microwave sterilizer.
- Munchkin Steam Guard – A more innovative 4 x 9oz microwave sterilizer with heat resistant handles.
- Philips Avent 3in1 – A stand-alone unit, that holds up to 6 x 11oz bottles and has several configurations.
- BabeBay Dual Sterilizer and Warmer – A 2 baby bottle sterilizer and warmer for milk, food, and formula.
- Dr Browns Sterilizer Bags – Microwave bags with 20 uses, ideal for travel or just saving space in the kitchen!
- JoyBaby Portable UV – A portable battery powered sterilizer for just the bottle nipple, ideal for travel
- Upang UV – If you’re serious about sterilizing, this might cost more but will make quick and easy work of everything.
Note: Our individual reviews are below, but you can also click any of the links above to check current prices on Amazon and other retailers
Other guides you might like:
Table of Contents
What you need to know…
Is a baby bottle sterilizer really necessary?
It is the view of one of the best health services in the world, the National Health Service in the UK that you should sterilize baby bottles until your baby is 12 months old.
Here’s the World Health Organisations pamphlet on how to prepare a bottle feed. They don’t specifically say whether you should or shouldn’t. But the preparation leaflet does include a sterilization step.
Webmd says you don’t need to bother, the practice is outdated and most modern water supplies are clean. Parents.com advises you should sterilize when you first buy them but after that, a good scrubbing or the top shelf of the dishwasher is enough.
My problem with just relying on the dishwasher is that often because baby bottles and tops are so light, they get flipped over. Then they just sit there, filled with dirty water and they don’t get washed properly.
Nobody is going to refute that sterilizing baby bottles kills all traces of viruses, bacteria, and parasites. These can be the cause of vomiting and diarrhea in babies and in some cases even mild thrush.
You can’t create a totally sanitary germ-free environment for a baby.
When they get to a certain age they put nearly everything in their mouths anyway!
What you can do by sterilizing when they are young is reduce the risks of them becoming ill.
How often do you sterilize baby bottles?
If you’re going to make sterilizing bottles part of your routine then it’s best done before each and every use of a bottle.
Use them, wash them in the dishwasher, sterilize and then assemble them and store.
How long do baby bottles stay sterile for?
Baby bottles can remain sterile within the best bottle sterilizers if you leave the lid closed. Exactly how long that is will depend on your sterilizer but up to 24 hours isn’t uncommon.
If you remove bottles from the sterilizer and assemble them using the sterile pincers provided they can also remain sterile in an assembled state for anything up-to 24 hours. After that, you really need to sterilize them again.
Do you wash baby bottles after sterilizing?
If you’ve used a steam or UV sterilizer, then washing your baby’s bottles isn’t necessary after sterilization. You do need to wash bottles to remove the old milk before you sterilize them, however.
If you sterilize your bottles in vinegar or bleach then yes, you definitely need to wash them again afterward.
How do you dry baby bottles after sterilizing?
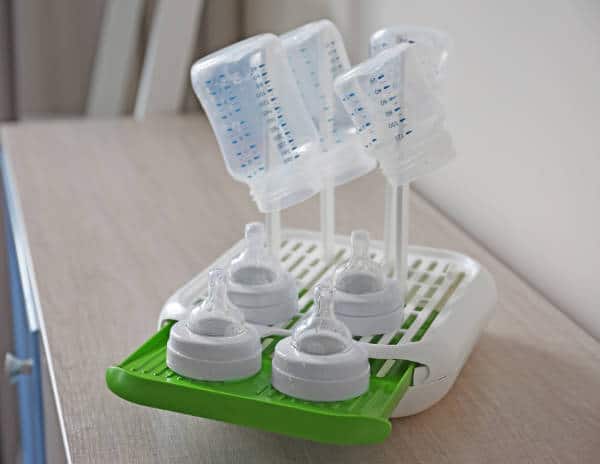
If you’ve used a steam sterilizer and the bottles have drops of water inside that water is sterile and so there’s no need to dry it. You are best just to assemble them and leave them as they come out of the sterilizer.
The best baby bottle sterilizer that use UV don’t get the bottles wet, so there’s no need at all.
Drying using any sort of towel or tissue will completely reverse the effects of sterilization! Even fresh towels can be full of germs!
Is it safe to use bleach or vinegar?
White vinegar is used in cooking and meat preservation and for medicinal, laboratory, and cleaning purposes. It’s pretty safe to use it to sterilize baby bottles by soaking them in a 50/50 solution of vinegar and water for say 20 minutes.
After soaking, however, you will need to clean them again to remove all traces of the vinegar. Otherwise, the smell and taste might affect your little ones feeding.
Bleach is great for cleaning and sterilizing. If you’re going to use it on your baby bottles then the solution needs to be very dilute (2 tsp per gallon of water) and you will need to make sure to wash all traces of the bleach solution off the bottles before use.
What age should you stop sterilizing?
Sterilizing baby bottles is really only necessary until your child is 12 months old. At this age, they can switch to cow’s milk and will probably be putting everything they can grab hold of in their mouth anyway!
The Different Types of Sterilization
Steaming – Microwave, electric and bag
Steam kills spores and microorganisms. Steam sterilizers are designed to hold the things you want to sterilize in such a way as to ensure that all surfaces can be covered by the steam they produce.
A microwave baby bottle sterilizer is usually portable and either a plastic container or a bag that you fill with a small amount of water. You then seal the container (or bag) and microwave it. The microwave heats the water to produce steam which sterilizes the things held inside. Be warned…. these things get hot!! You need to leave them for several minutes before you try to remove and open them.
On the other hand, a standalone electric steam sterilizer plugs in to a worktop socket and has a compartment that you put your bottles into but works on the same principle. These units also sometimes perform other jobs like drying.
UV
Much like too much sunlight is bad for your skin, too much UV-C light is bad for bacteria. It kills it.
UV sterilizers don’t get your bottles wet, they don’t contain any hot water so there’s no risk of burning yourself.
These are normally small units that also double as a place to store bottles before use. They are the least time consuming and easiest option for sterilizing but this comes at a price. That being they’re more expensive!
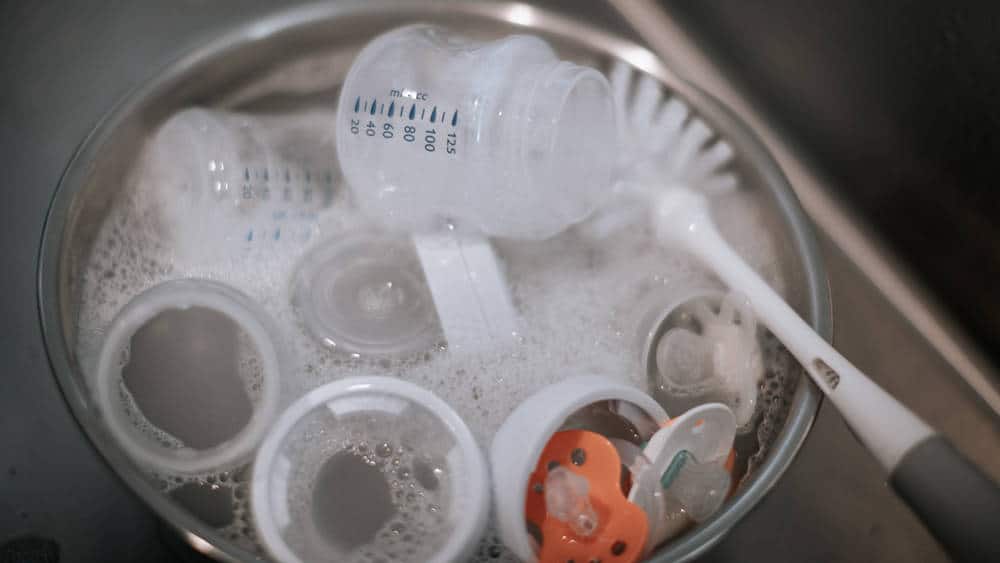
Boiling
The simplest and cheapest method of sterilizing baby bottles and even breast pump parts is to boil them in a large pan of water. This is as effective as steam sterilization and you don’t need any special kit to do it than what you already have in your kitchen.
Cleaning Agents
You can soak baby bottles, pacifiers, and other baby accessories in diluted white vinegar or even strongly diluted bleach to sterilize them. After doing this however you will need to wash and rinse thoroughly to remove all traces of the cleaning agent. Otherwise, it may smell of affect the taste of the milk.
Things to Consider
Portability – You will need to travel at some point and stay somewhere that may not have a sterilizer. Microwave steam sterilizers can be small enough to tote about on long trips. If you want to splash out on a UV sterilizer you’ll be stuck using it at home. But you can always boil when you’re on holiday right?
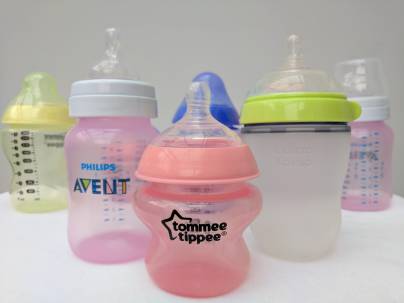
Bottle Capacity – You’re going to be sterilizing a lot if you do it every time you use a bottle. Make sure you consider how many feeds you need to prepare for in a day. How many bottles you will need ready and how many bottles you can fit in the sterilizer at one time.
When you’re putting bottles into a sterilizer you will have to disassemble them into their component parts for the sterilizer to be effective. So you’ll sometimes find they won’t hold as many bottles as you’d initially think.
Cost – Boiling is free and you’ll have a saucepan, stove, and water at home. Microwave sterilizers aren’t expensive. Standalone units will cost more and at the top of the scale, the UV sterilizer normally carries a hefty price tag.
Drying – It isn’t necessary to dry steam sterilized bottles but some standalone sterilizer units will. Not a necessity but a ‘nice to have’.
Reviews of Our Picks for Best Bottle Sterilizer
Philips Avent
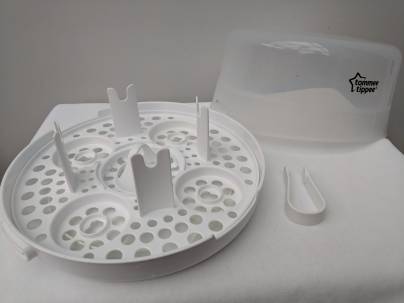
Philips Avent bottles are great, so it makes sense you’d look at their microwave sterilizer. It’s designed to fit inside most household microwaves with a height of 6.5” and a diameter of 11”.
This type of sterilizer is simple to use. It’s basically a large clear plastic tub with the clip-on lid. Inside the base you have a tray that allows you to lay out bottle bases tops upside down so that they will drip dry after steam has covered them.
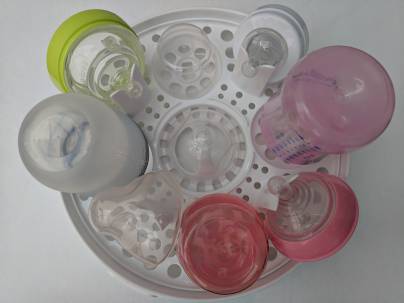
You can use this type of sterilizer for pretty much anything. This one will take 4 x 9 oz Avent bottles or 2 Avent breast pumps. You can also put pacifiers, breast pump parts, or any other accessories or bottles you’d like sterilized in there.
You fill the base with tap water and microwave for 2 minutes with an 1100w microwave. Other microwave powers also work fine, they just take a little longer. 6 minutes for a 500-850w for example. The microwave heats the water and makes the steam and sterilizes what’s inside the container. You can also leave the container sealed after the microwave has finished and keep items sterile inside for up to 24 hours.
What we liked:
- 2 minute cycle @ 1100w+
- Sealed sterile container
- Holds up to four bottles
- Can sterilize anything
- Sterile tweezers included
- BPA free
- Affordable
- Fast
- Portable
What we didn’t:
- Impatience may get you burned!
Munchkin Steam Guard
A slightly more innovative microwave steam bottle sterilizer from Munchkin. This one comes with heat resistant latch handles on the side.
Anyone who’s used one of these things knows that if you try to take them out of the microwave at the end of the cycle you’re liable to burn yourself. They get very hot! Heat resistant handles are going to make life a little easier when you have to switch the content of the microwave immediately. Another bonus is that the side latches open away so if you’re really jumping on this after just finishing there’s even less chance you’ll burn yourself on escaping steam.
This is designed to fit inside all common microwaves, external dimensions are 12.5 x 11.3 x 6.7 inches.
You’ll be able to fit 4 bottles of standard design inside, larger bottles and more unusual designs such as Playtex Ventaire and you’ll still be able to use it, but you won’t get so many inside.
What we liked:
- Heat resistant handles
- Holds 4 bottles
- Can sterilize anything
- BPA free
- Affordable
- Fast
- Portable
What we didn’t:
- Impatience may still get you burned!
Philips Avent 3in1
If you’ve got the room in your kitchen and you don’t need something portable then a stand-alone electric steam bottle sterilizers like this one from Philips is a great idea. Something like this is also a great idea if you’re going to be just bottle feeding as you’re going to get through a lot of bottles.
This style of sterilizer plugs in and sits on your work surface as a permanent addition. It isn’t small, about the size of a small espresso machine, but it will hold up to six bottles of Philips 330 ml / 11oz bottles. It also doubles as a sterile storage space for them if you leave it unopened for up to 24 hours after a sterilization cycle.
Similar to a microwave steamer this has a 6-minute cycle. One of the other main features of this is the 3-in-1 design. The main body of the sterilizer is actually 3 pieces. A base (that’s always used), a clear compartment for bottle tops and smaller items, and a larger compartment for bottle bases. You can use it with just the clear compartment fitted, just the larger compartment fitted or with both.
What we liked:
- Roomy, holds upto 6 bottles
- 6 minute cycle
- 24 hour sterile storage container
What we didn’t:
- Not easily portable
- Heating element may require cleaning periodically
BabeBay Dual Sterilizer and Warmer
If you’re using breast milk that’s been stored in the fridge or freezer or pre-prepared formula you’re going to have to warm it before you give it to your child.
This sterilizer from Babebay only accepts 2 bottles, the top is quite tall so you’ll be fine with nearly any design of bottle. In fact anything under 3 inches wide and 8 inches high. Not just bottles though you can use it to sterilize anything else that will fit inside. The major benefit you get from it is that it’s also a bottle warmer and you can also use the water bath to warm baby food.
The sterilization cycle takes longer than others taking 15 minutes to complete. You can warm a bottle of milk in about 5 – 10 minutes depending on how cold it is to start with.
You start either the warm milk, warm formula, warm food or sterilize cycles using one of 4 buttons on the front. If you need finer control over the temperature then there’s an LCD display in the middle and a dial that allows you to tweak things exactly.
What we liked:
- Warms food, milk, and formula
- Large top, compatible with many bottle designs
- BPA free
What we didn’t:
- 15-minute sterilization cycle
- Only takes 2 bottles
Dr Brown Sterilizer Bags
One of the simplest and most portable options for sterilization on the go are sterilizer bags. These ones from Dr. Brown can be used 20 times before you need to throw them away. You normally get 5 bags in a packet so that’s 100 sterilization cycles. More than enough for a holiday or short trip and plenty even for home use.
There is enough room inside each bag to fit 4 x 5oz bottles or 2 larger bottles. Of course, you don’t have to use them for bottles, they can sanitize pacifiers and any other piece of baby equipment you want.
To use these you open them, tip the prescribed amount of water inside, then add the bottles (in pieces), seal the top and microwave. When the microwave is done there is a small hole in the side that allows you to empty the hot water away before you open the bag.
What we liked:
- BPA Free
- Easily portable
- Reusable up to 20 times
What we didn’t:
- Only fit between 2-4 bottles depending on size
JoyBaby Portable UV
Here’s another solution that’s ideal for traveling.
This is a little portable cup sizes unit with a UV light that is powered by 2 x 1.5V AAA batteries. If you have children, you’ll undoubtedly have some lying around…. UV sterilization is used in hospital and clinics and is a proven method of killing bacteria.
There’s only enough room inside for a single pacifier or bottle nipple but you can sterilize one in about 4-6 minutes. There’s also a neat alternative way of using this by removing the base and actually fitting the light directly over a bottle.
What we liked:
- Portable
- Easy to use
- UV light – No water, no drying!
What we didn’t:
- Only sterilizes 1 bottle nipple or pacifier at a time
Upang UV
With a nicely designed exterior featuring one of several color accent choices (yellow, green or red) this little cabinet is a great alternative to the dangers of burning and the excess water that gets generated when you steam things.
This particular unit is popular in South Korea where they’re manufactured and if you travel there you’ll no doubt find them in children’s wards and clinics.
You can sterilize anything under the dual UV lamps. Whilst baby bottles are the most common, pacifiers, toothbrushes, nail clippers, toys, pretty much anything you get near your child can be 99.9% germ-free after a little spell inside this cabinet. That gives it a lifespan as a usable device that’s far greater than a steam sterilizer.
The inside is a mirrored finish to help bounce the UV rays around the interior and there’s a shelf to allow you to separate bottle nipples and tops and gives more usable space.
To sterilize with one of these the process goes like this. Wash, rinse, shake-dry, place in the sterilizer. Push the button, wait for the machine to cycle through drying, and UV and then you’re done. You have dry, sterilize bottles ready to assemble and feed with.
What we liked:
- UV light – No water
- Twin UV lights
- Infrared light to evaporate any moisture
What we didn’t:
- Pricey!